Satellite Image Processing Made Easy with Rasterio: A Comprehensive Tutorial
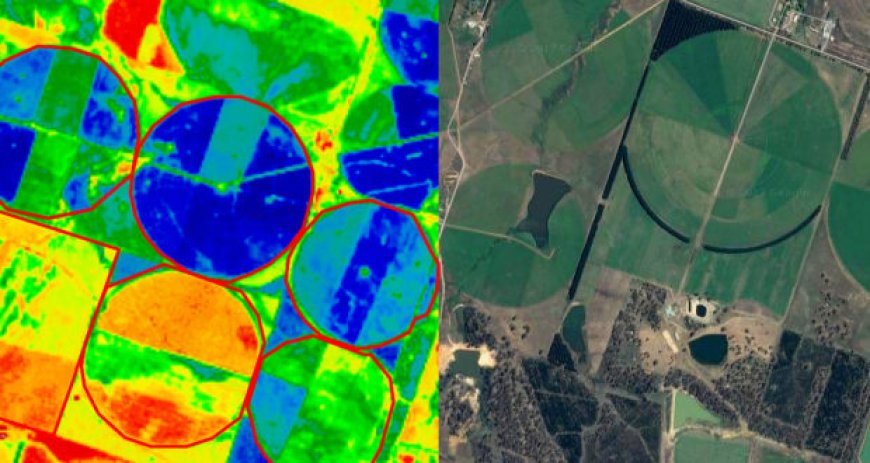
In this tutorial, we explore how to use Rasterio, a powerful Python library for working with geospatial raster data, to process satellite images. We cover the basic steps involved in reading, exploring metadata, processing, and visualizing satellite images using Rasterio functions such as subsetting, reprojection, and resampling. Whether you are new to satellite image processing or a seasoned expert, this tutorial provides a comprehensive guide to using Rasterio for your geospatial analysis needs.

Satellite imagery provides valuable insights into our planet, allowing us to observe changes in land use, vegetation cover, and environmental conditions. However, the vast amount of data contained in these images can be overwhelming, making it challenging to extract meaningful information from them. In this tutorial, we will explore how to use Rasterio, a Python library for working with geospatial raster data, to process and analyze satellite images. We will cover the basic steps involved in reading, processing, and visualizing satellite images using Rasterio.
Satellite image processing with Rasterio involves reading satellite images in a geospatial format, processing them, and writing the results back to disk in a format that can be used by other applications.
Here are the basic steps involved in satellite image processing with Rasterio:
-
Read the satellite image data into Rasterio using the
open()function. This will create a Rasterio dataset object that contains the image data along with metadata such as the image size, resolution, and projection. -
Explore the metadata of the image dataset using the properties and methods of the Rasterio dataset object. This information can be used to perform various operations on the image such as subsetting, reprojection, or resampling.
-
Perform the required image processing operations on the dataset using the various functions provided by Rasterio. For example, you can use the
resample()function to change the resolution of the image, or thewarp()function to reproject the image to a different coordinate system. -
Write the processed image data back to disk in a format that can be used by other applications using the
write()function. Rasterio supports a wide range of file formats including GeoTIFF, NetCDF, and HDF. -
Close the dataset object using the
close()function to free up system resources.
Getting Started with Rasterio
To begin working with Rasterio, you first need to install it. You can do this using pip, the Python package installer, by running the following command:
pip install rasterio
Once you have installed Rasterio, you can begin using it to read, process, and write geospatial raster data.
Reading Satellite Images with Rasterio
The first step in satellite image processing with Rasterio is to read the image data into a Rasterio dataset object. To do this, you can use the open() function, which takes the path to the image file as its argument. For example, to read a GeoTIFF image, you can use the following code:
import rasterio

with rasterio.open('image.tif') as dataset:
    # Do something with the dataset object
This code opens the GeoTIFF image file named 'image.tif' and creates a Rasterio dataset object that can be used to access the image data and its metadata.
Exploring Metadata with Rasterio
Once you have opened the satellite image in Rasterio, you can explore its metadata using the properties and methods of the dataset object. For example, you can use the width and height properties to determine the size of the image:
width = dataset.width
height = dataset.height
You can also use the bounds property to determine the geographic extent of the image:
bounds = dataset.bounds
This returns a tuple containing the minimum and maximum coordinates of the image in the format (left, bottom, right, top).
Processing Satellite Images with Rasterio
After you have read the satellite image into a Rasterio dataset object and explored its metadata, you can begin processing it using the various functions provided by Rasterio. Some of the common processing tasks that can be performed on satellite images using Rasterio include:
- Subsetting - selecting a smaller area of the image to work with.
- Reprojection - changing the coordinate reference system (CRS) of the image.
- Resampling - changing the resolution of the image.
Subsetting Satellite Images with Rasterio
To subset a satellite image using Rasterio, you can use the window() method of the dataset object. This method takes four arguments, which define the boundaries of the subset window: the column and row coordinates of the upper left corner, and the column and row coordinates of the lower right corner. For example, to extract a subset of the image that covers the area between columns 100 and 200 and rows 50 and 150, you can use the following code:
subset_window = rasterio.windows.Window(100, 50, 100, 150)
subset = dataset.read(window=subset_window)
This code creates a Window object that defines the subset window, and then reads the subset of the image data into a NumPy array.
Reprojecting Satellite Images with Rasterio
To reproject a satellite image using Rasterio, you can use the warp() function. This function takes the source dataset object, the destination
CRS, and other optional arguments such as the resampling method and the output resolution. For example, to reproject a satellite image from its current CRS to the WGS84 CRS, you can use the following code:
from rasterio.crs import CRS
dst_crs = CRS.from_epsg(4326) # WGS84 CRS
reprojected = rasterio.warp.reproject(
    dataset.read(),
    src_crs=dataset.crs,
    dst_crs=dst_crs,
    resampling=rasterio.enums.Resampling.nearest
)
This code reads the image data into a NumPy array, and then uses the reproject() function to reproject it to the WGS84 CRS using nearest-neighbor resampling.
Resampling Satellite Images with Rasterio
To change the resolution of a satellite image using Rasterio, you can use the resample() function. This function takes the source dataset object and the output resolution as its arguments. For example, to resample a satellite image to a resolution of 30 meters, you can use the following code:
import numpy as np
resampled = np.empty(
    (dataset.count, int(dataset.height / 2), int(dataset.width / 2)),
    dtype=dataset.dtypes[0]
)
rasterio.warp.reproject(
    dataset.read(),
    dataset.transform,
    out_shape=(dataset.count, int(dataset.height / 2), int(dataset.width / 2)),
    resampling=rasterio.enums.Resampling.bilinear,
    out=resampled
)
This code creates an empty NumPy array with half the height and width of the original image, and then uses the reproject() function to resample the image data to the new resolution using bilinear interpolation.
Visualizing Satellite Images with Rasterio
Finally, once you have processed a satellite image using Rasterio, you can visualize the results using matplotlib or other Python plotting libraries. For example, to plot a subset of the original image and the corresponding reprojected image side by side, you can use the following code:
import matplotlib.pyplot as plt
fig, (ax1, ax2) = plt.subplots(ncols=2, figsize=(12, 6))
# Plot the subset of the original image
ax1.imshow(subset[0], cmap='gray')
ax1.set_title('Subset of Original Image')# Plot the reprojected image
ax2.imshow(reprojected[0], cmap='gray')
ax2.set_title('Reprojected Image')
plt.show()
This code creates a figure with two subplots, and then plots the subset of the original image in the first subplot and the reprojected image in the second subplot.
Conclusion
In this tutorial, we have explored how to use Rasterio to read, process, and visualize satellite images. We covered the basic steps involved in reading satellite images using Rasterio, exploring their metadata, and processing them using various functions such as subsetting, reprojection, and resampling. Finally, we showed how to visualize the processed images using Python plotting libraries such as matplotlib. With this knowledge, you can now start working with satellite images and extracting valuable insights from them using Rasterio.
What's Your Reaction?


